Deteriorated classic car weatherstripping can make your vintage automobile look old and tired. In the classic car world the more original parts you retain the better. However, on a 50-year-old automobile the original weatherstrips can cost you some quality points at the local car show. When it comes to replacing classic car weatherstripping the name of the game is finding exact replica replacement parts.
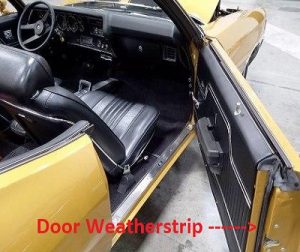
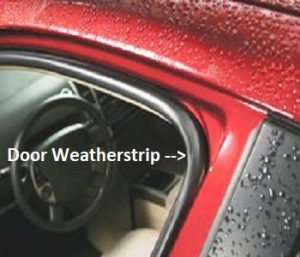
Although we often replace these rubber parts, because they look old and deteriorated, its main job is to keep water out of the automobile. On classic cars susceptible to rusting sheet metal panels, the weather strips ability to seal properly becomes more important than the appearance. Since every car built in the last 120 years, utilizes rubber weatherstripping this article applies to all automobiles. Nevertheless, those with T-tops and sunroofs will want to pay special attention to the tips provided here.
In this brief article we’ll provide information for removing the old weatherstrips. In addition, we’ll discuss sourcing new parts that look exactly like the original ones from the factory. Whether you have a classic Pontiac Firebird Trans Am or a vintage Mercedes-Benz achieving a watertight seal becomes paramount. In fact, it’s just as important is how the replacement parts look. This is why we’ll spend some time discussing the final installation. Classic car enthusiasts have a saying. Rust never sleeps. With that said, it’s a failed weather strip that lets the water in and helps the rust take over.
Removing Classic Car Weatherstripping
Automobile manufacturers use different types of weather strip retaining systems and adhesives. For this reason removal procedures can often become model specific. Some classic car auto repair manuals provide helpful step-by-step information to facilitate the removal of failed weatherstripping. Unfortunately, on older classic cars, with original parts, removing the old rubber can be a difficult operation.
Sometimes they come off one chunk at a time. Thankfully, some special tools help make this task easier. They make narrow blade scrapers that fit inside of the weather strip retaining tracks. For vintage automobiles that utilize a combination of glue and retainers, you can use specialized solvents. Patience is a virtue when it comes to using weatherstrip removing solvents. Make sure to provide enough soaking time for the chemicals to their job.
Preparation for Weatherstrip Removal
Extended soaking time of the old weather strips can mean less elbow grease required with the narrow blade scrapers. Although these weatherstrip solvents work well when used as directed, precautions must be taken to protect the paint. Body shop technicians often lay down protective masking tape around the tracks. In addition, they cover the painted surfaces in the vicinity in case any splashes occur. Taking extra time in this area is critical. There are a few more areas that also require some protection.
The weather strip retaining tracks are usually delicate and damage easily. After removing the bulk of the old weatherstripping go back and soak any remaining pieces and glue spots with additional solvent. Body technicians use a clever trick. They place a rag on top of the stubborn spot and then apply the solvent to the rag. Failure to completely remove all of the old glue can cause improper sealing of the new weatherstrips. When you’re finished, the tracks and mounting surfaces should look brand-new.
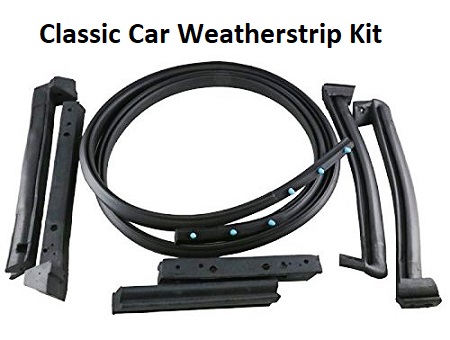
Classic Car Weatherstripping Kits
Thankfully, the classic car hobby enjoys worldwide popularity. Many auto parts companies do an excellent job of serving this niche market. Several large, respectable auto-parts companies provide complete classic car weatherstripping kits. Whether you have a 50-year-old classic Cadillac Eldorado or a 1970 Chevrolet Chevelle muscle car you will find exact match parts available.
You can save a lot of money by purchasing a complete kit even if you don’t intend to use all of the included parts. As a mechanic that has performed more than a few classic car restoration projects I can tell you that there are often surprises included in the weatherstripping kits. When you perform a complete restoration you uncover rubber components that exist in places you never thought of. Let me provide an example using a 1948 Cadillac 2-door fastback I helped restore.
On this vehicle and many other General Motors classic cars, you’ll find a rubber gasket between the trunk emblem and the painted surface. These old Cadillac cars are known for water leaks in the trunk. Often by the time people figure out where the leak was coming from, it became necessary to replace the trunk pan. Replacing the tiny little weatherstrip underneath the trunk emblem can save you a lot of time and aggravation down the road.
Another consideration that we mentioned in the previous section becomes the retaining system used by different car manufacturers. The companies that produce these weatherstrip kits also supply specialized molding clips and oddball retaining fasteners. My advice is to give one of these companies a call and speak to somebody before you begin the project. This is better than ordering it online and figuring it out for yourself.
Classic car weatherstripping Final Installation Tips
When you get the classic car weatherstripping kits they come packaged pretty tightly. These rubber pieces can also come with a manufacturing residue on them. Therefore, wash all of the weatherstripping with soap and water, especially the spots where you apply the weatherstrip adhesive.
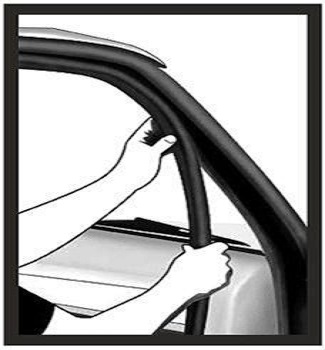
Next, it’s a good idea to lay all the pieces out in the sun and allow them to return to their original molded shape. Now it’s time to perform a dry fit installation. The dry fit is when you fully install the parts without the retainers and the glue. This allows you to get a feel for the curves and straight runs.
The trial run process helps you identify the difficult areas of the installation and verify you got the right parts. With the dry fit completed, you’re now ready for a permanent installation. Body shop technicians usually have their favorite types of weatherstrip adhesives. With that said, 3M makes an excellent weatherstrip adhesive product. The best advice is to apply the adhesive to one section at a time.
Once you have perfected that section you can raise it up at the end, and then overlap the weatherstrip adhesive to apply the next section. Although you will have to work quickly, you still have plenty of time before the weatherstrip adhesive cures completely. This is another reason for working one section at a time. Finally, allow 24 to 48 hours for a complete cure before performing a water test to verify proper sealing.